I'm starting to like USD more and more so let's write some code in Solaris. We'll look at setting attributes on our lights using the USD API and HOM. Then we'll finish it off by creating flickering lights.
This tutorial assumes basic knowledge of USD.
I've set up this simple scene in Solaris: a box, a XZ grid , four lights and a camera.  Let's drop down a python lop and change the intensity of our lights to be 0, essentially turning them off.
For now, we're only going to select one light and turn it off, and we'll see later how we can select all of them.
We'll get our light prim with stage.GetPrimAtPath('/lights/light1'). Note the upper case G in Get, that's sort of a gotcha as all the Houdini methods start with a lowercase letter, but this is Pixar's API. It takes some time getting used to.
Let's print that: >>> Usd.Prim(</lights/light1>). We now have a Usd.Prim object. Let's set its intensity to 0.
First we need to get the attribute object: intensity = light.GetAttribute('inputs:intensity')
Tip:
Not sure what your attributes are? Look at the Solaris Spreadsheet aka the ScreneGraphDetails.  Or you can print em all with print(prim.GetAttributes()).
Let's now set that attribute to 0: intensity.Set(0).
The whole snippet looks like this:
node = hou.pwd()

stage = node.editableStage()

light = stage.GetPrimAtPath('/lights/light1')

intensity = light.GetAttribute('inputs:intensity')

intensity.Set(0)
Now that we've done this, we can look at SideFx's preset for this! 
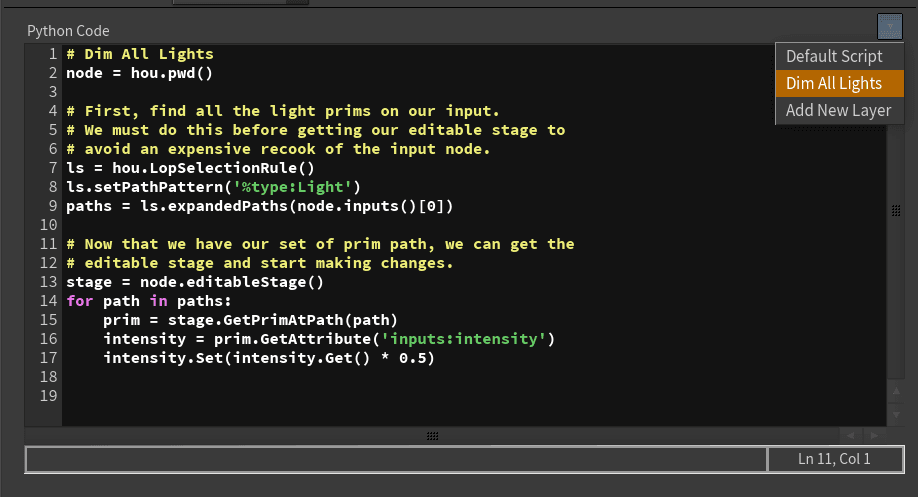
It essentially does what we've just done, except it uses hou.LopSelectionRule() to avoid having to hardcode paths into your code. The LopSelectionRule Class means you can also create a parameter on your node that you could use to get the path.
ls = hou.LopSelectionRule()
ls.setPathPattern('%type:Light')
paths = ls.expandedPaths(node.inputs()[0])
If you're wondering what %type:Light refers to, it's what USD calls a primitive matching pattern. These patterns let you select primitives based on some condition. Here's the docs page:.
Let's now look at animating our lights. We'll turn them on and off again to create some kind of flickering.
We'll turn them all off to start with, then we'll drop another python lop to implement the flickering logic in. All I've done here is used the Preset but replaced 0.5 with 0.0, making the intensity 0.0 on all those lights. In the next python lop we'll use the preset again but delete the line where it sets the intensity.
First things first: let's set a random intensity per light.
There are a million ways to generate random values and it's slightly outside the scope of Houdini Python so I'll share my snippet here and we'll move on to actually animating the values.
import secrets
import numpy as np

node = hou.pwd()

ls = hou.LopSelectionRule()
ls.setPathPattern('%type:Light')
paths = ls.expandedPaths(node.inputs()[0])

stage = node.editableStage()

for index,path in enumerate(paths):

	prim = stage.GetPrimAtPath(path)

	intensity = prim.GetAttribute('inputs:intensity')

	seed = secrets.randbits(86+index+35)

	rng = np.random.default_rng(seed+index+362)

	rand_float = rng.uniform(0.5,2.5)

	intensity.Set(rand_float)
In this snippet I'm importing secrets to generate a random seed, then using numpy to generate a random float between 0.5 and 2.5. Do know that using secrets means your code will evaluate to something different each time so be careful ! For more predictable results you can do this instead: rng = np.random.default_rng(index). Then delete these two lines: import secrets and seed = secrets.randbits(86+index+35).
Let's look at only setting that intensity on random frames. What I'm going for here is: one light blinks every like 2 frames then another one blinks every 3 or 4 frames, etc...
So I'm gonna generate a random integer that I'll then use with modulo. If frame%modulo == 0 returns true, then I'll activate the light.
To animate our inputs:intensity, we'll have to author its time samples.
The Usd Prim Attribute methods Set()and Get() actually sample the value at the given time sample. If left blank, you're sampling at the default time sample, aka Usd.timeCode.Default(). Note that if you want to explicitly use it, you'll need to import Usd: from pxr import Usd. Let's use the overloaded function to author our time samples: primattrib.Set(value,time).
import secrets
import numpy as np
import random


node = hou.pwd()

ls = hou.LopSelectionRule()
ls.setPathPattern('%type:Light')
paths = ls.expandedPaths(node.inputs()[0])

stage = node.editableStage()

framerange = hou.playbar.frameRange()
start = int(framerange.x())
end = int(framerange.y())

for index,path in enumerate(paths):

	prim = stage.GetPrimAtPath(path)

	intensity = prim.GetAttribute('inputs:intensity')

	#create random float

	seed = secrets.randbits(86+index+35)

	rng = np.random.default_rng(seed + index+362)

	rand_float = rng.uniform(0.5,2.5)

	#create random int

	random.seed(seed+index+45)

	randint = random.randint(2,6)

	for i in range(start,end+1):

		intensity.Set(rand_float,i)
Our code now looks like this. We're iterating through every frame of the timeline and setting the random value every frame with primattrib.Set(value,timesample). If you need to get a value at a specific time sample then use primattrib.Get(timesample).
Almost there ! Now we want to add a condition to only set the intensity to that random float if frame%randint == 0. No if blocks necessary, let's be clever and multiply rand_float by (i%randint == 0).
	for i in range(start,end+1):

		intensity.Set(rand_float * (i%randint==0) ,i)
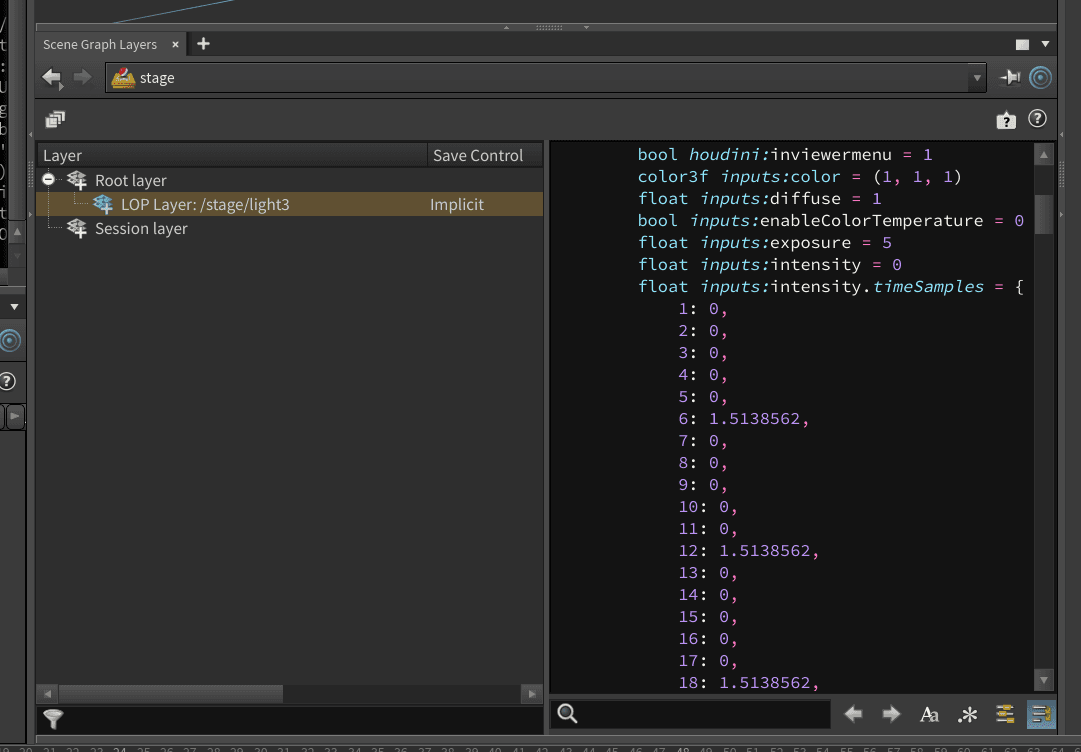
We can now inspect our time samples with the SceneGraphLayers. 
Let's have a look at our animation. Warning: flashing lights
We can randomize it further by generating a random int every time sample.
	for i in range(start,end+1):

		random.seed(seed+index+545+i)

		randint = random.randint(2,6)

		intensity.Set(rand_float * (i%randint==0) ,i)
Note that you could do this in vex as well and it might be easier. Here's the code:
float frame = f@Frame;

float rand = fit01(rand(i@elemnum+6230),0.5,2.5);

int randint = int(fit01(rand(i@elemnum+frame+365241),2,8));

f@inputs:intensity = rand * (int(frame) % randint == 0);
While this works, it's less performant than Python. The performance hit isn't that huge though so vex is still a good option inside of LOPs, if you'd rather go that route. If performance is crucial then Python is much better suited for the task.
Let's have a final look at our code:
import secrets
import numpy as np
import random


node = hou.pwd()

ls = hou.LopSelectionRule()
ls.setPathPattern('%type:Light')
paths = ls.expandedPaths(node.inputs()[0])

stage = node.editableStage()

framerange = hou.playbar.frameRange()
start = int(framerange.x())
end = int(framerange.y())

for index,path in enumerate(paths):

	prim = stage.GetPrimAtPath(path)

	intensity = prim.GetAttribute('inputs:intensity')

	#create random float

	seed = secrets.randbits(86+index+35)

	rng = np.random.default_rng(seed + index+362)

	rand_float = rng.uniform(0.5,2.5)

	for i in range(start,end+1):

		random.seed(seed+index+545+i)

		randint = random.randint(2,6)

		intensity.Set(rand_float * (i%randint==0) ,i)
Don't forget to get rid of secrets if you want more predictable results.

Custom Metadata
flag
Here's how you can write custom data to USD prims and fetch them inside parameters.
In a python lop we can do :
node = hou.pwd()
stage = node.editableStage()
prim = stage.GetPrimAtPath('/geo/myCube')
prim.SetCustomDataByKey("myCustomData","/geo/sphere")
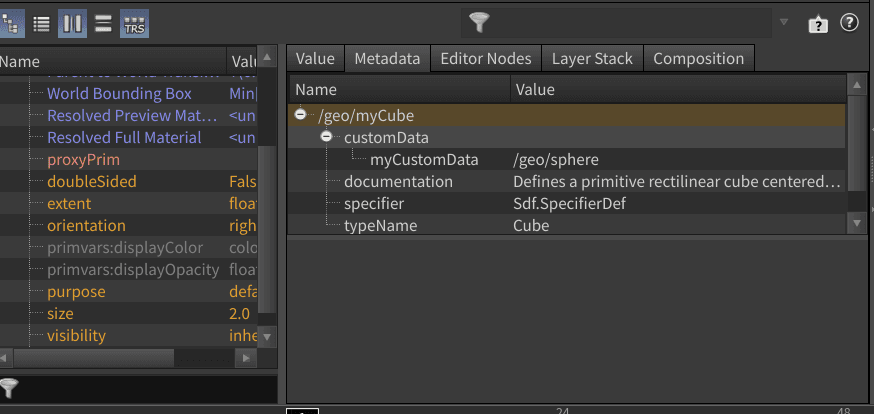
You know have custom data in your prim's metadata.

You can now use a pretty long python expression to get that value inside a parameter (don't forget to tell Houdini it's a python expression and not a string value or a hscript expression)
hou.node('.').input(0).stage().GetPrimAtPath('/geo/myCube').GetCustomDataByKey('myCustomData')You could always create a primvar instead.
from pxr import Sdf
node = hou.pwd()
stage = node.editableStage()
prim = stage.GetPrimAtPath('/geo/myCube')
customattrib = prim.CreateAttribute("myCustomAttrib",Sdf.ValueTypeNames.String)
customattrib.Set("/geo/sphere")
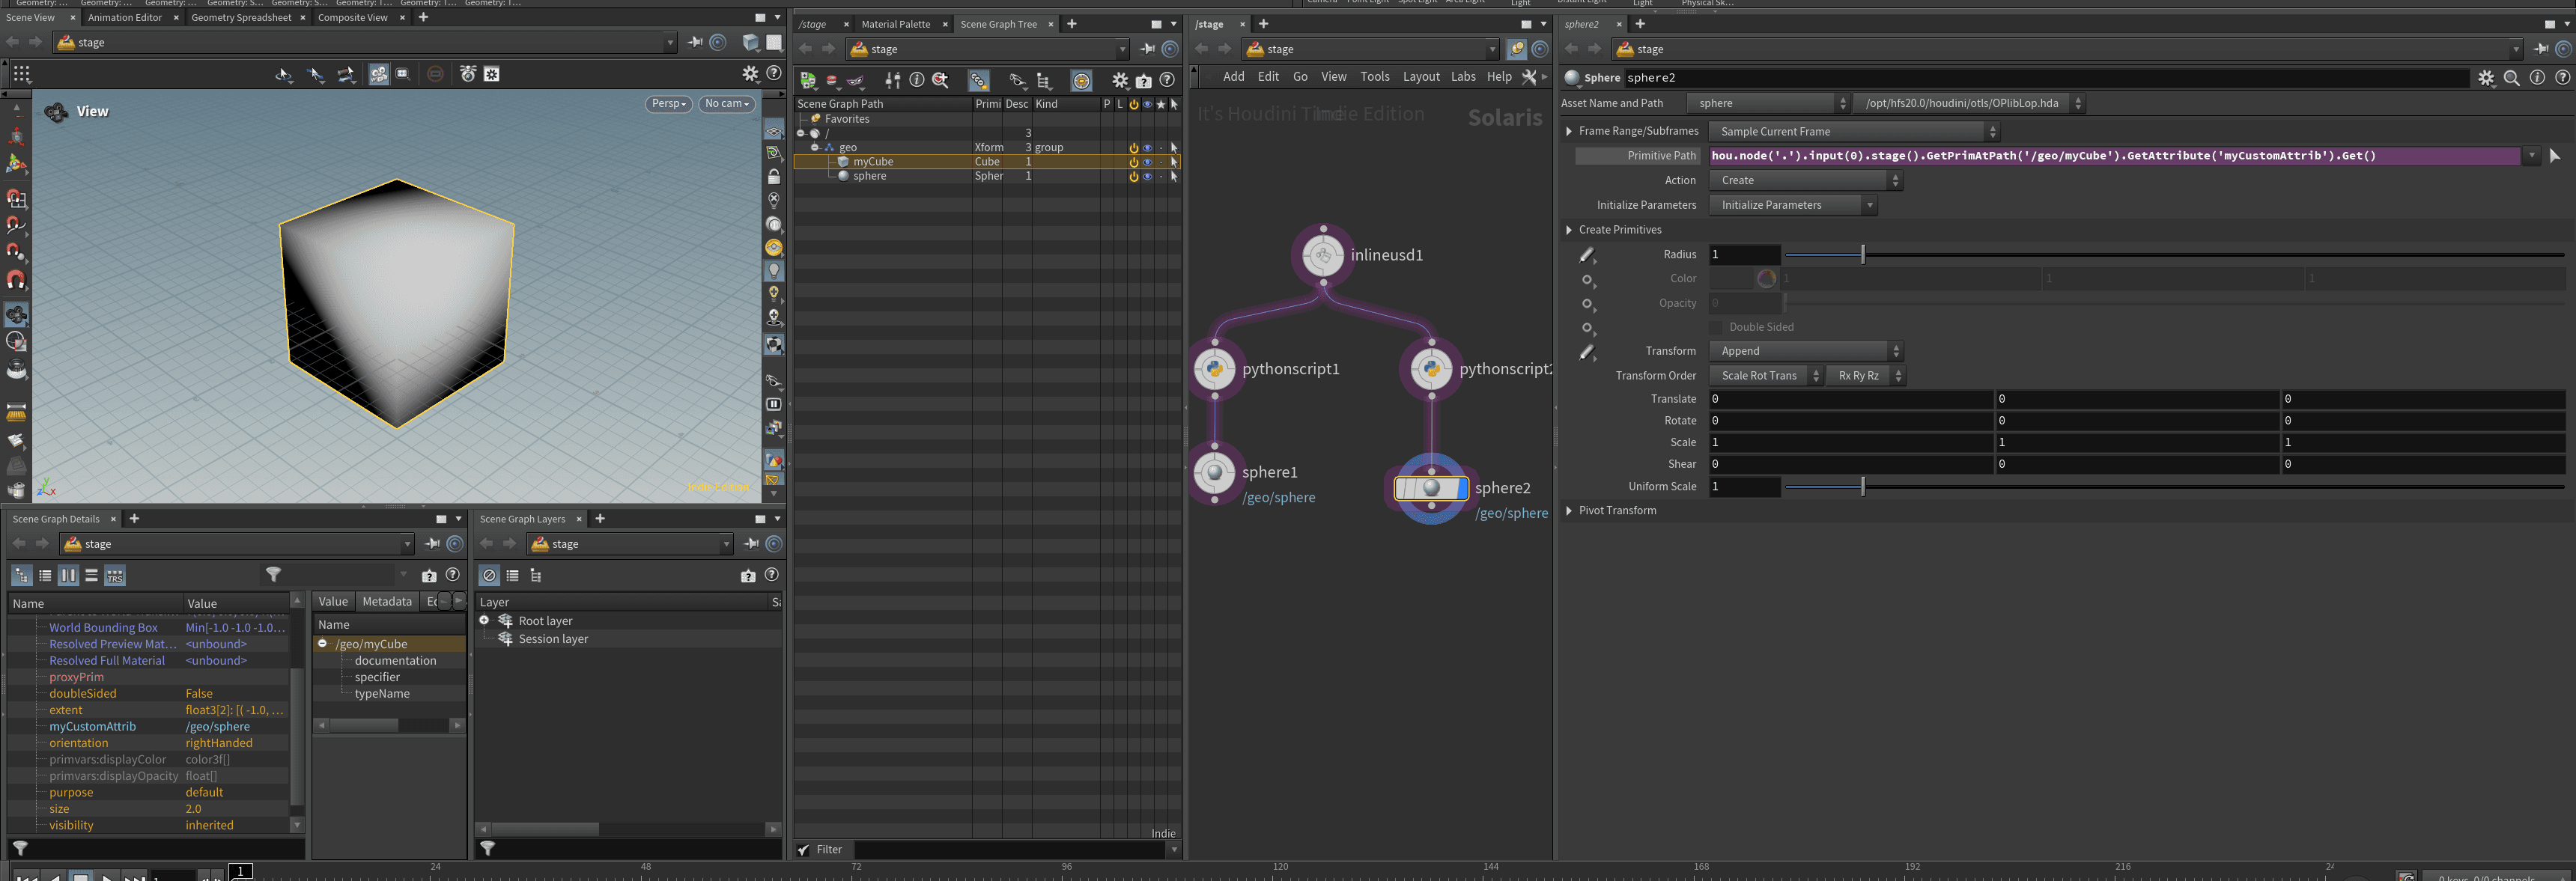
Then to get it, use
hou.node('.').input(0).stage().GetPrimAtPath('/geo/myCube').GetAttribute('myCustomAttrib').Get()
